



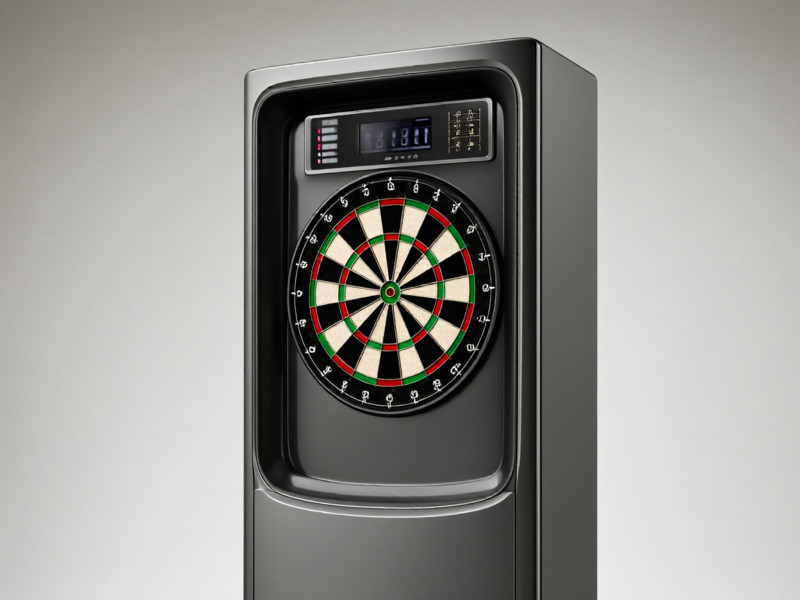
快速回答: An electronic dartboard OEM sample is ready for a meaningful review only when it is tied to a written use case, an agreed interface brief, a complete accessory list and a packaging plan. Buyers should test the whole player journey, record open decisions and approve a dated revision. That gives the buyer and manufacturer the same reference when a sample changes or production planning begins.
1. Describe the program before requesting a sample
Start with the commercial context: who will use the board, where it will be installed, how it will be sold and what the buyer expects the product to do. A home recreation product, a retail gift item and a machine intended for a venue can lead to different requirements for cabinet construction, controls, instructions and service access. Put the channel, target user, destination markets and expected product configuration in a short brief. If the product is meant to fit an existing range, include the relevant model names and explain which elements must remain consistent. This context helps the supplier distinguish required features from optional ideas and reduces the chance that the team spends time sampling a version that cannot be sold through the intended channel.
2. Turn player interaction into testable steps
Describe how a player gets from opening the package to starting and finishing a game. List the power-up sequence, game selection, player setup, score display, sound settings, pause or reset behavior and what the product should do after an interruption. Avoid broad wording such as “easy to use”; write down an observable action and the expected response. During sample review, ask several reviewers to complete the same play sequence without coaching. Note where labels are unclear, a control is easy to press by accident or the feedback arrives too late to understand. Include language, units, button names and any accessibility needs that matter to the audience. The sample should be judged against the agreed interface, not against an undocumented expectation held by one reviewer.

3. Specify the board, cabinet and installation together
The board and its cabinet form one product experience. Record the overall appearance, finish references, graphic placement, mounting approach, access panels and the space needed to install or service the product. Add drawings or marked photographs when a written description could be interpreted in several ways. Confirm which dimensions are controlled and which are still under development; do not assume that a photograph communicates a tolerance. Review the cabinet in the orientation a customer will see, and check that the instructions match the actual mounting arrangement. If the unit will be displayed beside other products or fitted into a venue layout, share the relevant surroundings and available footprint. Ask the supplier to identify design assumptions before they are treated as approved requirements.
4. Make the accessory list part of the specification
Name every item included with each SKU and show its quantity. Separate standard contents from optional accessories, replacement parts and promotional bundles. Where a part has several variants, identify the chosen version with a drawing, reference sample or clear image; a generic name may not be enough to distinguish similar items. Confirm whether the package includes mounting components, darts, replacement tips or other items appropriate to the particular product configuration. The instruction sheet, product photography, barcode data and online description should all reflect the same pack-out. Review the actual sample contents by laying them out and checking them against the list. If a supplier proposes a substitution, ask for written approval and assess whether it changes use, appearance, cost or the customer’s expectation.
5. Review software, language and artwork as product components
For an electronic board, the interface and its content need the same revision control as the physical product. Provide the requested language, game names, button labels, on-screen prompts, warning text and artwork files in an organized package. Identify which text must remain editable and which visual elements are fixed. Ask the supplier to mark any text that is shortened, translated or positioned differently from the supplied artwork. Then compare the display, printed instructions and packaging so that the names and steps match. If different markets receive different versions, give each version a unique code and keep a market-by-market change list. Do not approve a screen image by itself: use the sample to follow the actual sequence, check readability at the expected viewing distance and find places where a player might misunderstand what to do next.
6. Create a repeatable sample acceptance protocol
Agree on who will review the sample, what evidence will be recorded and what constitutes approval. A useful checklist covers physical appearance, board response, control behavior, sound, display, included items, setup instructions and package condition. Use a simple test script with numbered actions, expected results and a field for observations. Repeat important steps rather than relying on a single play-through. Capture photographs or video for issues that are difficult to describe, and identify the sample by model, revision and review date. Separate a confirmed defect from a requested enhancement and from an open question; these categories lead to different decisions. Before a sample is approved, close every issue that affects the product requirement or explicitly document who owns the decision and by when. Approval of an early sample should not silently approve later substitutions or artwork changes.

7. Include retail packaging and shipping presentation
Review packaging at the same time as the product because the carton, inserts and printed material affect what the buyer receives and how the product is presented. Specify the required pack contents, artwork revision, barcode location, language, protective elements and any retailer-specific labels. Ask for images of the packed unit and, where practical, inspect a complete packed sample rather than only a flat artwork proof. Check that parts are secured, small items are easy to account for and the opening sequence is understandable. If the product will be shipped through more than one channel, explain the handling path so the packaging review can consider the relevant constraints. Do not claim that a package is transit-tested unless a defined test was actually completed; instead, ask the supplier to state what evidence is available and what still needs validation.
8. Control versions and change requests
Treat the sample as a controlled version. Put the model code, hardware revision, software or interface revision, artwork revision and sample date on the approval record. Keep a change log that states what changed, why it changed, who requested it and whether the change affects the quote, testing, packaging or instructions. When the next sample arrives, compare it with the last approved version and verify each requested change. A change that appears cosmetic can still affect the retail image, fit or assembly, so ask the relevant owner to review it rather than assuming it is harmless. Before discussing a production release, confirm that the final requirements, approved sample, pack-out and acceptance criteria point to the same revision. This simple document control prevents different teams from working from different versions of the brief.
9. Compare supplier proposals on the same basis
Ask each supplier to quote against the same product brief and show what is included, optional or excluded. Compare the proposed configuration, assumptions, sample plan, revision process, documentation, packaging and communication schedule alongside price. A lower price may reflect a different accessory set or an assumption the buyer did not intend; a more detailed proposal can reveal open items early. Request a list of decisions needed from the buyer and identify which inputs could change cost or timing. Keep commercial terms separate from product acceptance, and do not treat a quotation as proof that an untested feature will work as expected. A clear comparison sheet helps procurement, product and quality teams discuss the same facts before they commit to a sample or a launch window.
Questions buyers often ask
What should I send before asking for an electronic dartboard OEM sample?
Send the target market and sales channel, intended player, product configuration, drawings or reference images, artwork and language needs, accessory list, packaging expectations and sample acceptance checklist. Mark any item that is provisional so the supplier can price and plan it as an open decision.
Should I approve packaging at the same time as the board?
Yes. Review the product and its pack-out together. Packaging can affect protection, retail presentation, barcodes, instructions and the list of included items, so a separate late approval can create avoidable revisions.
How should I compare two samples?
Use the same dated checklist and repeat the same player sequence on each sample. Record the model and revision, capture observable results, and separate required corrections from optional improvements.
Can the supplier substitute an accessory after approval?
Treat any substitution as a change request. Ask what differs, why it is proposed and whether the product experience, packaging, documentation or quote changes. Approve it in writing before the specification is updated.
For product details, review DAYIN dartboard OEM and ODM capabilities and share a brief with the requirements, samples and open questions relevant to your project.